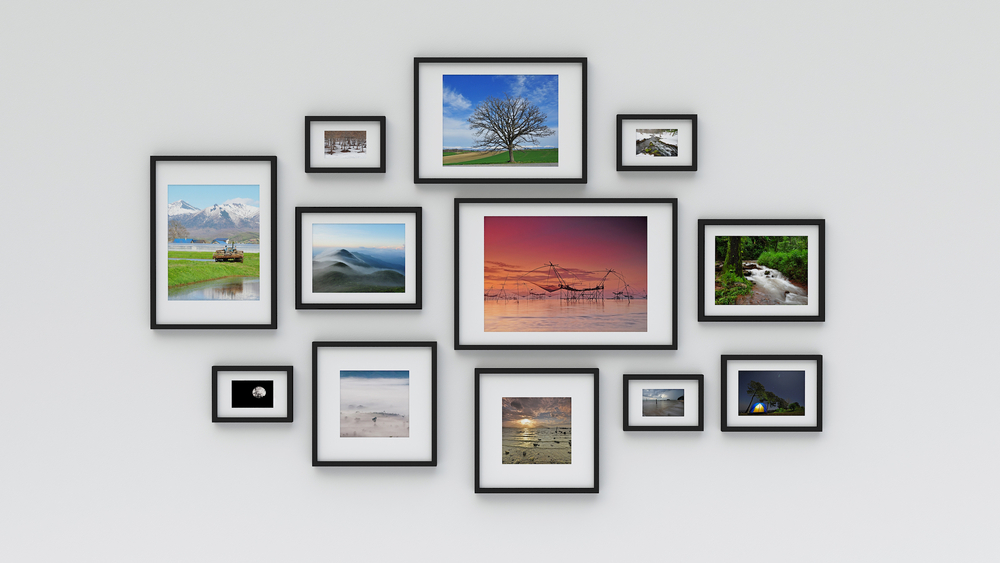
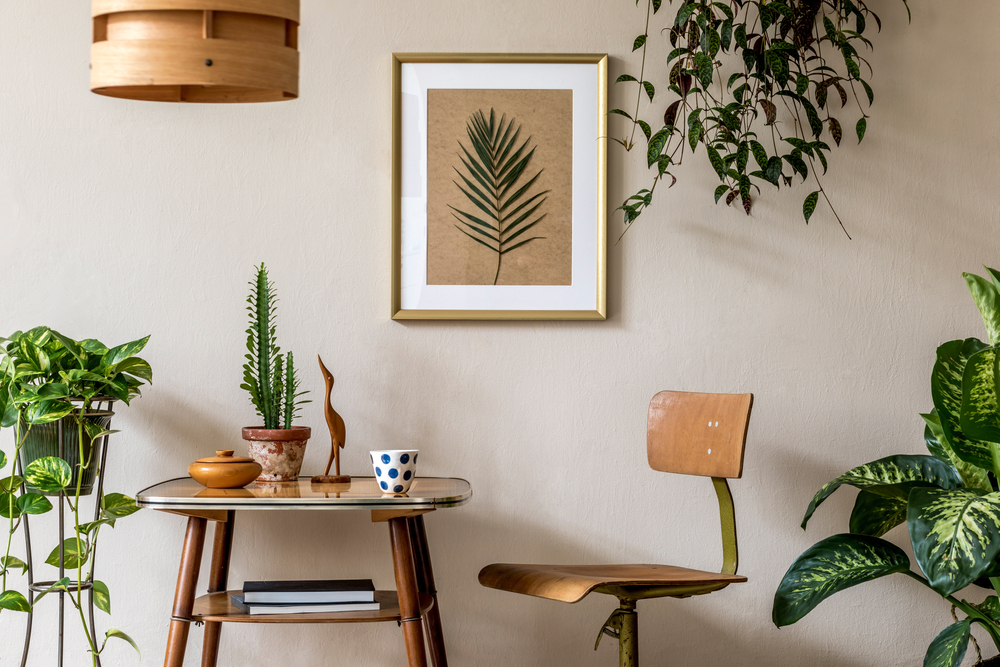
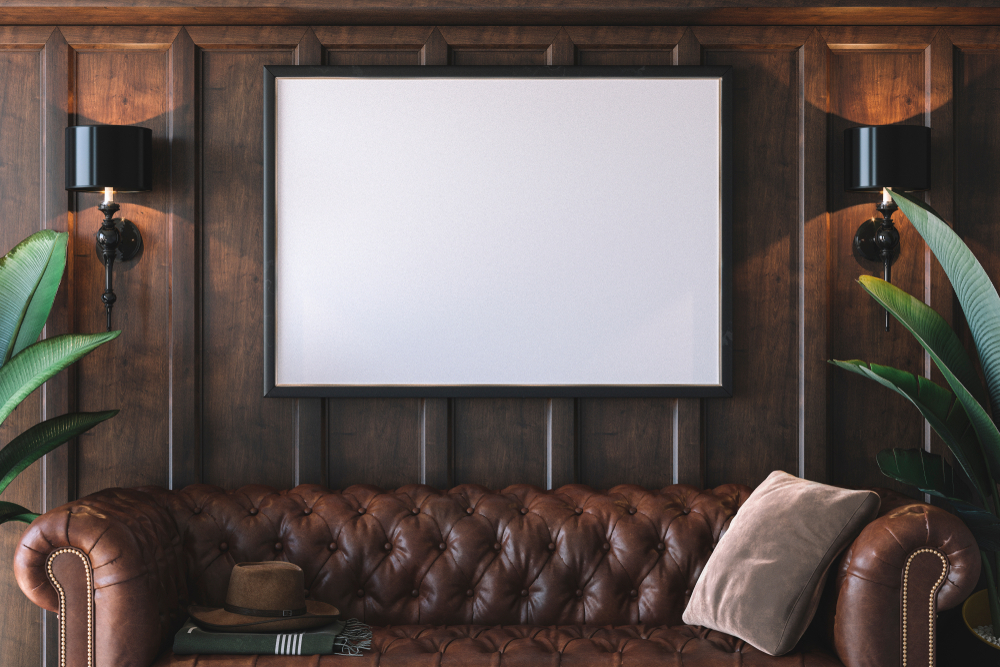
Informative

How to Choose the Perfect Picture Frame | Expert Tips 150 150 admin

How to Choose the Perfect Picture Frame | Expert Tips

How to Choose the Perfect Picture Frame Expert Tips

Looking to transform your cherished memories into framed wall arts that perfectly match your space’s style and ambience?

Choosing the perfect picture frame is more than just finding a holder for your artwork; it’s about enhancing the beauty of your valuable memories while complementing the style and decor of your living area. Framing goes beyond the act of hanging a picture on the wall, but about crafting a visual masterpiece – it involves a strategic approach to finding the perfect frame that not only enhances your artwork but also seamlessly integrates with your interior design.

At Framous Picture Framing, we know the confusion involved in selecting the perfect frame for your picture. Our extensive range of custom picture frames with different styles, colours, and shapes offer you a plethora of options to explore, yet choosing from these choices can feel overwhelming.

However, fear not!

We’re here to guide you through the process and help you select the ideal frame that not only complements your piece but also uplifts its appeal within your home or office. Let’s dive into the art of choosing the right picture frame for your cherished artworks or memories!

Tips to Choose the Perfect Picture Frame that Complements Your Artwork

10fc55687e

Tip #1: Consider the Material or Type of Picture Frame

Different styles and pieces work well with different material frames. So, when it comes to selecting the ideal frame for your artwork, one of the first decisions you’ll face is choosing the right material of the frame, a crucial part of enhancing your art’s presentation.

Remember, picture frames usually fall into three main categories. Here’s an easy answer to a commonly asked question:

Should I go Wood or Metallic Frame?

AspectsTraditional / Wooden FramesModern / Metallic FramesTransitional Frames
Material / Made ofHigh-quality wood such as oak, walnut, or maple                     Metal (aluminum or steel) or ultra-plain woodMix of materials with minimal ornamentation
Appearance / LookClassic look that adds warmth and character to your artwork, often with ornate carving or oriental accents           Sleek, modern and clean finish, lightweight and durable           Minimal adornment with a balance between traditional and modern aesthetics
Ideal forTraditional artwork or vintage-inspired display (Paintings, wholesome photographs)Modern art, black-and-white photos, minimalist pieces             Various art styles and room decors; subtle yet stylish framing option

Tip #2: Consider frame Colour

Having difficulty in choosing the right frame color for your artwork? Let’s us help you and make it easy for you.  Frame colour significantly impacts its overall look and feel, enhancing its beauty and complementing your space’s style.

So, when picking the perfect frame color, you just have to focus some key factors to blend your masterpiece seamlessly with your room’s decor.

Trust your instincts and go with what feels right for you since you’ll be the one enjoying the final display!

Choose a Color from your Picture:

Choosing from the artwork’s palette is a safe and cohesive option. Consider selecting a frame color that already exists in your artwork. This not only accentuates a specific color but also creates a sense of continuity within the display. Here are two options:

  • Match the frame color to a dominant shade in the artwork for stability
  • Choose a smaller detail to draw attention to that particular color, making your picture stand out.

Match the Room’s Color Scheme:

Never ignore your room colours! Take hints from the predominant colors in your room where your artwork will be showcased. By choosing a frame color that complements or harmonizes with these colors, you can create a cohesive and integrated look, flawlessly blending the artwork into its surroundings.

Highlight or Contrast for a Dramatic Effect:

Decide if you want the frame to harmonize with the surroundings or stand out as a striking focal point.

  • Want a Subtle Display? Match the frame color to the color of the wall to create a harmonious and unified presentation, binding the whole display together.
  • Looking for a bold dramatic effect? Opt for a contrasting or completely opposite of the colors in your artwork to make both the artwork and frame pop, adding visual interest to the space.

This creates a dramatic effect that draws attention to the framed display, making it a bold statement piece in your room. Using a metal-styled frame with this approach can amplify the impact without overwhelming the artwork.

Go Neutral:

535e76d089

Preferring a versatile option that complements your artwork and interior style? Go for neutral-colored frames; a timeless option for your picture to be stood central.

  • White frames are clean, classic, and timeless, making colors within the picture pop.
  • Black frames offer a sophisticated and elegant look that complements almost all artworks or photographs.

Tips #3: Size Matters

Right size of the frame makes sure you achieve a visually appealing and structurally sound display. Consider following tips to help you make the right size decisions:

Measure Your Artwork Carefully:

Determine and measure the length, width, and depth of your picture, especially if it’s three-dimensional. These dimensions are important when providing sizing to the framer.

Remember that picture edges will be slightly covered by the frame, so factor this into your measurements.

Consider Artwork Type and Style:

The type of artwork, whether it’s a single picture or a collage-style arrangement, influences your frame size choice.

  • Having larger-sized pictures? Opt for a wider frame with matboard or mount to create correct proportions and provide structural strength to support the weight of the artwork, glass, and backing.
  • Considering less detailed scenes or artworks? Go for thicker custom frames, acting as a buffer to the image and enhancing its presence.

Leave Room for Breathing Space:

Allow for some breathing space between the artwork and the frame. A small gap of around 1/8 to 1/4 inch adds depth and prevents the artwork from touching the glass, avoiding potential damage.

Ensure Balance between Artwork and Frame:

Pay attention to the proportions and balance between the artwork and the frame. A frame that is too large can overpower the artwork, while a frame that is too small may not provide adequate support or visual impact.

Tip#4: Consider Matting / Matboard Magic

Wondering ‘Should I add the Mat or not?

Here’s the answer! Matting adds a special touch to your piece, creating a decorative border that enhances its overall presentation. Check why matting can work magic for your framed art:

  • Enhances Overall Decoration of the Artwork:

Matting adds a layer of elegance and sophistication to your display. It acts as a buffer between the artwork and the frame, creating a visually appealing separation that draws attention to the art itself.

  • Gives Formal and Tidy Look:

Including a mat lends a formal and organized look to your framed artwork. It creates a clean border around the art, making the presentation more polished and professional.

  • Promotes Complementary Effect:

Matting can enhance the colors and details of your artwork by providing a neutral or contrasting background. It matches or complements the picture within the frame and then your artwork stands out and catches the viewer’s eye.

  • Suitable for Small Artwork:

While larger art pieces may not essentially require matting, it can be mainly beneficial for smaller artworks. A large matting can help create a balanced display for pieces smaller than 5″x5″.

At Framous Picture Framing, we offer a range of matting options to suit your artistic vision. Whether you prefer a single or double mat style, or you’re looking for a specific color or texture for your matboard, we have you covered. Our diverse selection of matting styles allows you to get creative and custom frames online to perfectly complement your artwork.

Choosing the Picture Frame that Complements Your Room Décor

472fd9e057

Although the main task of framing is to highlight your artwork, you should also consider where the art will be hung as it should feel complementary to its surrounds.  

Now, let’s explore how you can choose the perfect picture frame that not only complements your artwork but also enhances your room’s entire look.

  • Assess Your Room’s Style

Before you pick a frame, take a moment to breathe in the essence of your space. Is it whispering modern elegance, radiating traditional warmth, or dancing with eclectic charm?

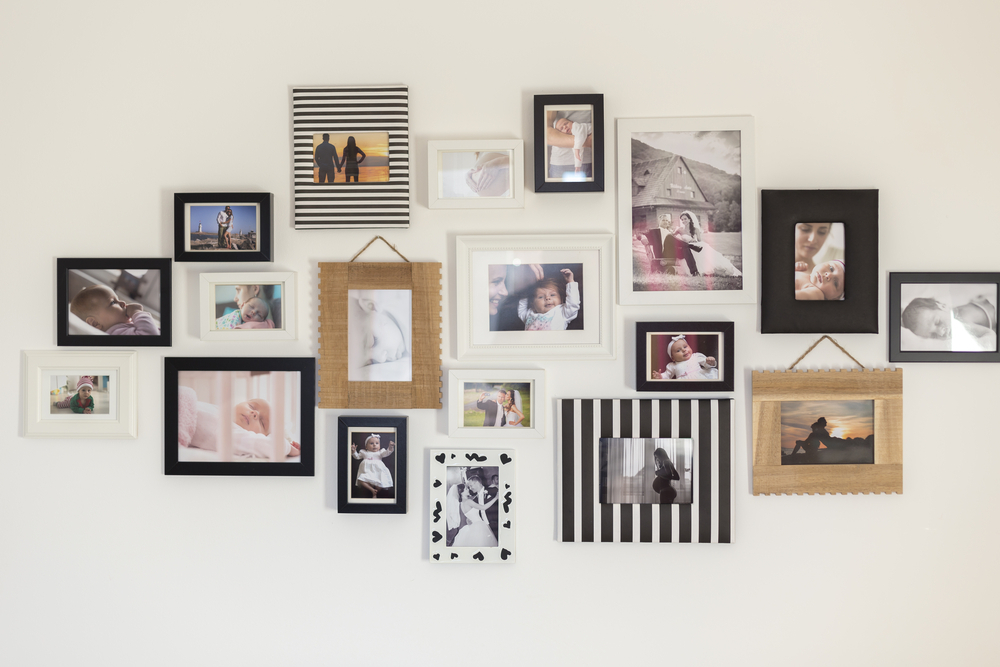
Understanding your room’s theme and color palette will guide you in selecting frames that integrate with the overall ambiance. Whether your walls whisper minimalist serenity or shout vibrant eclecticism, let your room’s personality guide you towards gallery wall frames that seamlessly blend in or boldly stand out, enhancing the very essence of your space.

Moreover, don’t shy away from playing with contrasts to create a visual masterpiece.

Contrast isn’t just about colors; it’s about creating a dynamic energy that captivates the eye, drawing attention to your artwork and infusing the space with a sense of excitement and personality.

  • Harmonize with Existing Decor

Your room is like a canvas, with every element adding brushstrokes to create a masterpiece. When choosing a frame, think beyond just the artwork itself. Consider what else shares the wall and the surrounding space.

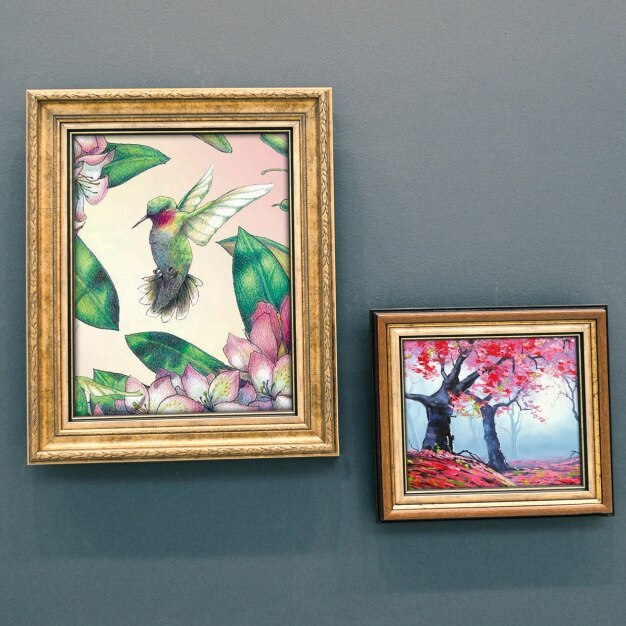
Imagine a sleek black iron sideboard standing beneath your artwork, displaying sophistication and charm. Now, to balance out this bold statement, opt for a lighter frame in white or oak. This contrast not only adds depth to the room but also prevents one material from overpowering the space.

It’s like finding the perfect harmony in a symphony of design elements, creating a visual rhythm that resonates throughout the room.

  • Match Frame Material to Room Elements

Material of the poster frames should match the room elements – creating harmony and cohesion in your space.

Imagine your room as a story, with each element playing a role. If you have wooden furniture that exudes warmth and natural beauty, a wooden frame for your artwork can continue that narrative seamlessly. It’s like adding another chapter that fits perfectly with the rest of the plot.

Conversely, if your room boasts a modern vibe with sleek lines and metallic accents, a metal frame can be the perfect supporting character. It complements the contemporary aesthetic, adding a touch of sophistication and tying everything together.

  • Consider Available Space

If your artwork is small and you opt for a large frame, it can easily overpower the art and make the entire display look unbalanced. On the flip side, a small frame on a large wall might get lost and fail to make a visual impact.

Balance is the Key!

Find that sweet spot where your artwork and frame harmonize effortlessly. You want your artwork to stand out without overpowering the room or fading into the background. It’s all about creating a visually pleasing composition where every element—the frame, the art, and the space—works together in perfect harmony.

  • Work on Light and Visual Effects

Lighting plays a crucial role in shaping how your artwork is perceived in a room.

For example, placing wall lights strategically to cast shadows can add depth and texture to your walls, making the artwork come alive with dynamic visuals. These dramatic shadows add an element of mystery and allure, drawing viewers in and creating a unique viewing experience.

In smaller spaces with white walls, opting for white frames can be a clever design choice. The white frames blend seamlessly with the walls, creating a cohesive and minimalistic look. This visual blending not only opens up the space but also allows the artwork to take center stage without distractions, enhancing the overall sense of openness and simplicity in the room.

Got a masterpiece that needs to be preserved and displayed in style?

Stop searching ‘picture framing near me’!

Contact Framous Picture Framing | Get Top-Quality Customized Picture Frames Today!

We specialize in expert custom picture framing!

With the largest range of frame mouldings, mattings, and decorative materials, our expert Perth picture framers offer endless possibilities to create a frame that complements your artwork and enhances your space. Whether you have a specific design in mind or need design assistance, we’ve got you covered.

So, wait no longer!

Explore Our Picture Frames Online Now!

Let us help you transform your artwork into a stunning display that captivates and enhances your space.

How to Build a DIY Mirror Frame in 6 Steps | Easy Tutorial 1024 576 admin
How to Build DIY Mirror Frame in 6 Steps

How to Build a DIY Mirror Frame in 6 Steps | Easy Tutorial

So, why frame your mirror?

Well, plain, unframed, builder-grade mirrors get the job done.

BUT

Let’s be honest, they’re not exactly eye-catching. Building a DIY frame for a mirror is a simple and super affordable way to jazz up your space visually. You can achieve professional-looking results without spending a lot.

In this easy-to-follow tutorial, we’ll show you how to spice up your home with a DIY mirror frame.

Whether you’re a pro or new to DIY. Framous Pictures will walk you through every step to create a mirror that reflects your style perfectly.

No Tools? No Problem!

How can I make a mirror frame without using any expensive tools?

Well, who says you need a toolbox full of gadgets for a DIY mirror frame project. With a little creativity and the right adhesive. You can transform your plain mirror into a beautiful focal point without ever picking up a hammer or drill.

The beauty of this DIY project lies in its simplicity and convenience. No need for expensive tools or complicated techniques. All you need is a heavy-duty adhesive that can securely adhere to glass surfaces.

Project Snapshot

  • Budget-Friendly Cost: $20 to $40.
  • Skill Level: Beginner-friendly. No advanced skills required.
  • Time Commitment: 1 – 2 hours of active work, spread over 1 – 3 days

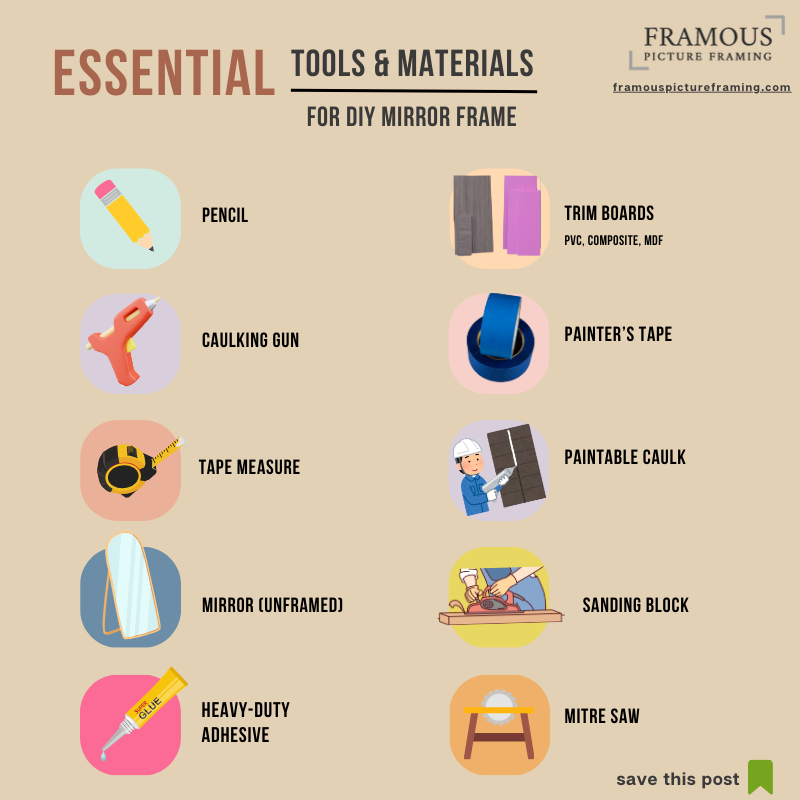
Essential Tools & Materials for Your DIY Mirror Frame

Before you start your project, make sure you’ve got all the right tools and materials on hand.

Here’s what you’ll need:

Tools to Get the Job Done

  • Pencil
  • Caulking gun
  • Tape measure
  • Mirror (unframed)
  • Mitre saw or mitre box and saw
  • Trim boards (select to fit your style and space)
  • Heavy-duty adhesive (suitable for glass)
  • Finishing supplies (Sanding block, Paintable caulk, Painter’s tape)

With these essentials ready to go. You’ll be all set to tackle your DIY mirror frame with ease.

Essential tools for DIY Mirror Frame

Before You Start: Decide Your Framing Style First

Before you rush to get your supplies. Think about the kind of look you want for your mirror frame.

  • Do you want it to feel warm and cozy? Then knotty pine might be the way to go.
  • And if you’re going for a timeless, sleek look. Then primed MDF trim pieces are just what you need.
  • If you prefer a more relaxed, beachy vibe. Then framing a mirror with wood having fewer knots will be perfect.

With so many options, there’s a material to match every taste. Now that you’ve picked out your materials. It’s time to start making frame for mirror.

Follow these easy steps to put together your DIY mirrors on wall. You can adjust them to fit your space and style perfectly.

Let’s get started!

DIY Mirror Frame Tutorial: 5 Simple Steps

Here’s a step-by-step guide for DIY mirror framing.

Let’s get started!

Step 1: Get Exact Measurements for Your Mirror Frame

To start, grab your tape measure and let’s get measuring your mirror. Place the tape measure against your mirror and note down the dimensions. It’s important to make sure your measurements are exact. So, you know how much trim you’ll need for your frame.

Keep in mind that the inside of your frame should be smaller than the mirror. This way when you attach the frame. There’s enough space for it to fit snugly around the mirror. This ensures a secure hold once the frame is glued in place.

With the measurements noted down. You are ready to move on to the next step of your DIY mirror frame project.Top of Form

Step 2: Choose the Right Trim Boards

The second step in your project is to select the perfect trim boards that suit your style. Consider the width and thickness of the trim boards to match the size and style of your mirror.

Look for boards that are between 2 to 4 inches wide for the best results. You can also find narrower or wider options depending on your choice. Trim boards come in different lengths, so it’s essential to choose carefully to avoid unnecessary waste.

Trim boards are available in a variety of materials. They each have their special features and benefits:

  1. Wood: Wood trim offers a natural and traditional look. Giving it a timeless and classic look.
  2. PVC & Composite Materials: If you want something strong and resistant to moisture. PVC or composite trim boards are great choices. They’re perfect for places like bathrooms where there’s a lot of humidity.
  3. MDF (Medium-Density Fibreboard): MDF boards are made by mixing wood fibres with a special glue. They are sturdy, like wood. But they have a smoother surface and fewer bumps.

Now, let’s talk about the different styles of trim boards:

  • Flat, Colonial, Decorative Profiles: These profiles add texture and visual interest to your mirror frame. You can pick the one that matches your home decor best.

And finally, let’s look at the finishes:

  1. Primed: These boards are ready to be painted. You can get creative and choose any colour you like to make your mirror frame unique.
  2. Pre-painted or Stained: If you want to save time. You can buy trim boards that already have a colour or finish on them. It’s a quick way to get the look you want without needing to paint or stain them yourself.
  3. Unfinished: You can also get trim boards that haven’t been painted or stained yet. This gives you the freedom to apply your own stain or paint for a custom look.

Step 3: Cut and Prep Your Trim Boards

Now it’s time to get those trim boards ready for your mirror frame! Here’s what you need to do:

  1. Measure & Mark Your Trim Boards: First, use a pencil to mark the measurements on the trim boards based on the size of your mirror. Make sure to measure correctly. So, your frame fits perfectly.
  2. Cut Trim Boards with Mitre Saw: Use either a mitre box and saw or a mitre saw to cut the trim boards. Make 45-degree angled cuts on each end of the boards. This helps them fit together neatly at the corners of the frame. Remember, the cuts on the top and bottom pieces should point in opposite directions.
  3. Double-check Your Measurements Before Cutting: Cut the top and bottom pieces of the frame to match the length of the mirror. And the side pieces to match its height. Double-check your measurements before cutting to avoid mistakes.
  4. Smooth Edges with Sanding Block: After cutting, use a sanding block to smooth out any rough edges on the trim boards. This gives your frame a nice, polished look and prevents any splinters.

You can also find helpful tutorials online that show you exactly how to make these cuts and give you tips for getting them just right.

Step 4: Attach Trim Broads to the Mirror Using Heavy-Duty Adhesive

Now, let’s attach the trim boards to your mirror to make the frame. Here’s what you need to do:

1: Glue the Bottom Piece: Put a good amount of adhesive on the outer edge of the bottom trim board. This prevents any glue from showing up in the mirror’s reflection later on.

Carefully place the trim board on the mirror’s bottom edge. Hold it tight for the time mentioned in the adhesive’s instructions. Then use painter’s tape to keep it in place until it dries completely.

2: Glue the Sides and Top: Repeat the process for the side and top trim pieces. Use the edges of the mirror as your guide. If you want extra strength, put adhesive on the angled edges before sticking them together. Be sure to wipe away any excess adhesive to maintain a neat finish.

3: Glue the Top Piece: Once the sides are glued. Put the top trim board in place. Apply adhesive to the back and carefully position it along the mirror’s top edge.

If you’re worried about the frame’s stability. You can also use mirror edging or brackets for extra support.

Expert Tip: Make sure to check how long the adhesive takes to dry. Read the instructions carefully to avoid any problems.

Step 5: Fill in Any Gaps and Make the Frame Pretty

After the adhesive has fully dried and you’ve removed the painter’s tape, it’s time to address any gaps and put the final touches on your mirror frame. Here’s how to do it:

  1. Fill Any Gaps in the Mitre Joints With Paintable Caulk: Once the glue has dried completely. Carefully peel off the painter’s tape. Inspect the mitre joints of your frame for any gaps. Use paintable caulk to fill them in.
  2. Wipe Off Excess Caulk: After applying the caulk, wipe away any excess with a damp cloth or sponge.
  3. Allow The Caulk To Dry Completely: Let the caulk dry completely according to the manufacturer’s instructions. This typically takes around 24 hours. But be sure to check the caulk label for specific drying times.

Step 6: Final Touches | Apply Finish to the Frame to Complete the Look

Now comes the fun part. Applying finish to your frame.

First, decide how you want your frame to look. Whether you prefer the natural beauty of stained wood, a trendy whitewashed effect, or a classic paint job. Consider the overall aesthetic of your space and select a finish that complements your decor style.

  1. Do you like a rustic style? Then use a special stain with a weathered stain colour to make the frame look aged.
  2. Want a coastal vibe? Mix white latex paint with water and put it on thinly for a whitewashed look.
  3. If you like a clean and modern look.  Then just paint the frame with your favourite colour of latex paint.

Once you’ve chosen your desired finish. Apply it evenly to the surface of the frame using a brush or sponge applicator. Follow the manufacturer’s instructions for application and drying times to achieve the best results.

If you’re using natural wood that won’t be painted. You can just add a clear sealant to protect it and make it shine.

Bonus Idea: If you want to make your mirror look fancy, then go for decorated mirror frames. Add decorations like fake nails or other pretty items to the frame to make it look nice.

Final Thoughts

And there you have it, “do it yourself mirror frames”. With just a few simple steps, you’ve transformed your plain old mirror into a beautiful statement piece for your space.

So go ahead and get creative!

Custom Frame Your Mirror with Framous Picture Framing

Upgrade your plain, boring mirrors with our custom framing service.

Add a personal touch to your space with frames that match your style perfectly. Choose from a variety of frame styles and sizes.

Frame Your Mirror Now

Basics of Canvas Framing: How to Pick Right Frame 150 150 admin

Basics of Canvas Framing: How to Pick Right Frame

Basics of Canvas Framing

Choosing the ideal frame for your canvas artwork is as important as selecting the artwork itself. A mismatched frame can make even the most stunning piece of art appear awkward or out of place.

On the other hand, the right frame can enhance the beauty of your artwork and safeguard its value.

In this guide, we’ll walk you through the basics of Canvas framing your canvas art with ease. Let’s make your art canvas look its best!

Why Canvas Framing Matters | 3 Key Benefits

Canvas framing is simply putting your canvas artwork onto a frame. It keeps your art safe and makes it look nicer. It’s like giving your artwork a cozy home to stay in.

It offers several advantages:

  • Longevity: It helps your artwork last longer.
  • Protection: It shields your artwork from dirt, dust, and damage.
  • Professional Look: It adds to the appearance of your artwork, giving it a polished and professional look.

Canvas framing includes stretching and securely attaching canvas artwork to a frame. This not only safeguards the artwork but also provides a means to showcase it in your home or office.

2 Types Of Canvas Frames

Two primary types of canvas frames exist: gallery-style and floater-style.

Type #1: Gallery-Style Frames

Gallery-Style Frames are the go-to choice for canvas art. Comprising side rails, a top rail, and a backboard. They provide a classic and secure display.

These frames give your art canvas a timeless and classy appearance that works well with any style. The side and top rails ensure your artwork stays firmly in place. The backboard adds extra protection and stability, keeping the canvas safe from damage.

Whether it’s a family photo or a modern piece of art. These frames provide a stylish and dependable option for proudly displaying your artwork.

Type #2: Floater-Style Frames

Floater-style frames offer a modern twist, lacking a backboard and giving the illusion of the artwork “floating” within the frame. This effect is achieved by custom canvas stretching over a spacer bar.

These frames offer a sleek and minimalist look that complements modern decor styles. By eliminating the backboard, they allow the artwork to stand out on its own, drawing attention to its beauty and depth.

Whether it’s a vibrant abstract painting or a serene landscape. These frames provide a modern and stylish option for displaying your art with sophistication.

How To Choose the Right Canvas Frame? | 3 Easy Steps

When it comes to picking a frame for your canvas art, keep these tips in mind:

Step #1: Choose Frame that Matches Your Artwork Style

Think about the style of your artwork.

  • For modern pieces, go for frames with clean lines.
  • For traditional art, consider ornate frames that match the classic vibe.

Here’s how to match the frame to your art:

  1. Canvas Frame for Modern Art: If your artwork features clean lines, bold colours, and minimalist design, go for frames with simple, sleek profiles. Think of black or metallic frames with straight edges. These frames complement the contemporary look and allow the artwork to take centre stage.
  2. Canvas Frame for Traditional Art: For artwork with a more classic or traditional vibe, consider frames with ornate details. These decorative frames add an elegant touch that complements the timeless appeal of the art.

Step #2: Pick the Right Colour

When it comes to picking the colour for your frame. It’s important to choose one that works well with your artwork without stealing the spotlight.

Make sure the frame colour goes well with the colours and style of your artwork. You want it to enhance the art, not overpower it. If you’re not sure which colour to choose, black is a safe option. It usually goes well with most artworks.

Here’s some practical advice to help you choose the best frame colour for your artwork:

1. Make Your Artwork Stand Out

Consider the dominant colours in your artwork and choose a frame colour that complements them.

For example, if your artwork features warm tones like reds and oranges, a wooden frame complements it nicely.

2. Black Frames Are Classic & Fits Everywhere

Black frames are indeed versatile. But be mindful of the overall mood you want to create.

They work well in modern and minimalist settings. But are not the best choice for lighter or more whimsical pieces.

3. Experiment with Different Colours

Experiment with different frame colours to see which one brings out the best in your artwork.

Don’t forget to consider the colours of your walls and the room’s decor to ensure the frame complements the space as a whole.

4. Test Them Out

Before making a final decision, take advantage of mock-up tools or physically place different coloured frames around your artwork to see how they look in the space.

This hands-on approach can help you visualize the final result and make a confident decision.

Step #3: Pick Correct Size for Your Frame

Make sure the frame is the right size for your artwork. It should be proportional to the piece to avoid it looking awkward or overwhelming.

Here are some practical tips to ensure your frame fits your artwork perfectly:

1. Measure Carefully

Use a ruler or tape measure to get precise measurements of your artwork’s width, height, and depth. This ensures you choose a frame that fits like a glove.

2. Allow for Breathing Room

When selecting a frame size, aim for a slight overlap of the frame around the edges of your artwork. This prevents any part of your art from being covered up and gives it room to breathe.

3. Match the Size to Surrounding Space

Think about where you’ll be displaying your artwork.

  • If it’s in a small room, a large frame might overwhelm the space.
  • On the other hand, a small frame might get lost in a large room.

Choose a size that balances well with the surrounding environment.

4. Visualize the Final Look

Before making a final decision.

“Use paper or cardboard cutouts to imitate the size of the frame around your artwork.”

This allows you to visualize how the finished piece will look and make any necessary adjustments before purchasing the frame.

DIY Canvas Framing Tutorial | 5 Easy Steps

Follow these simple guidelines for framing your artwork:

Step 1 || Prepare Your Workspace

Clear a flat area large enough for the frame and canvas. Lay down a clean cloth to protect the artwork.

Step 2 || Position the Canvas

Place the canvas face down on the cloth and centre the frame over it.

Step 3 || Secure the Canvas

If you’re using a traditional frame, you need to attach the canvas to the stretcher bars first. Then, fit the canvas and stretcher into the frame. Ensure it’s tightly placed against the rabbet.

Step 4 || Fixing the Canvas

Use points or small nails to secure the stretcher bars in place within the frame.

Step 5 || Final Touches

Attach hanging hardware to the back of the frame if needed. Also, consider adding protective backing paper.

3 Tips for Gallery-Worthy Professional Finish

Here are 3 simple tips to make your framing look super professional like it belongs in a gallery:

Tip 1: Invest in Quality Materials: Don’t skimp on the frame. Better materials mean your artwork looks better and lasts longer.

Tip 2: Use the Right Tools: Grab tools like a point driver to make attaching the canvas to the frame a breeze and super accurate.

Tip 3: Mind the Details: Little things matter, like making sure your hanging hardware is all lined up perfectly. It can totally change how your artwork looks in the end.

DIY Canvas Artwork Framing | 4 Expert Tips

Are you DIY framing your canvas artwork? Here’s what you need to keep in mind:

1. Gather Your Tools: Make sure you have all the necessary tools handy:

  1. Measuring tape,
  2. Hammer,
  3. Level, 
  4. Nails,
  5. Saw.

2. Measure and Cut: Carefully measure your artwork and cut the frame pieces to the right size. Use a level to ensure the frame stays straight.

3. Assemble the Frame: Attach the side rails to the top and bottom of your artwork. Then connect the top rail to the side rails. Secure the backboard in place to finish assembling the frame.

4. For Floater-Style Frames: Follow the same steps. But instead of a backboard, stretch the artwork over the spacer bar and secure it. Then, insert the spacer bar into the frame.

Bonus Tips

Consider these additional tips for framing canvas artwork:

  1. Preparation is Key: Make sure your canvas is tightly stretched and trimmed before framing.
  2. Accuracy Counts: Measure carefully, especially for stretched canvas, to get a snug fit.
  3. Protective Measures: Add a barrier between canvas boards and frames to protect your artwork over time.
  4. UV-Protection to Prevent Fading: If you’ve used acrylic paint, opt for UV-resistant glass or plexiglass to prevent fading.

With these simple but crucial tips, you’ll create a beautiful frame that not only complements your artwork but also keeps it safe for years to come.

3 Common Problems & Solutions of Canvas Framing

Framing isn’t always smooth sailing. Here are common hurdles and how to leap over them:

Problem #1: Misalignment

Problem: You’ve carefully placed your canvas in the frame. Only to find it’s off-centre and wonky. It’s like trying to fit a square peg into a round hole.

Solution: Take a close look at your canvas and frame setup.

Is it perfectly aligned?

If not, don’t panic. Grab a measuring tape or ruler and check for symmetry. Adjust the canvas until it sits snugly in the frame’s centre. Once aligned, secure it firmly in place.

Remember, precision is key here!

Problem #2: Frame Warping

Problem: Your once neat frame now looks more like a wavy noodle than a straight line. This bending messes up how nice your canvas looks, and it makes it wobbly and insecure.

Solution: Get rid of weak frames! Choose strong materials that last. Pick hardwood or metal frames with sturdy corners. They keep your canvas in great shape and prevent it from bending.

Problem #3: Damaged Corners

Problem: Uh-oh! Your frame’s corners, once sharp and neat, now have ugly chips and cracks. It’s enough to make any art lover cringe.

Solution: Handle with care. When putting the frame on your canvas, treat it like breakable glass.

Don’t be rough or use too much force. Secure each corner gently to keep it snug without breaking anything. If you see any cracks or chips, stop and rethink.

Sometimes, being gentle is all you need to keep those corners looking good for a long time.

Remember, Rome wasn’t framed in a day! Take your time, stay calm, and tackle each obstacle with patience and precision.

You’ve got this!

Frame it Right

In conclusion, by following these simple tips, you can take your artist canvas framing skills to the next level.

Invest in quality materials, use the right tools, and pay attention to the details. With practice and attention to detail, you’ll soon be creating professional-looking frames that are ready to be showcased in any gallery.

Keep honing your skills, and don’t be afraid to get creative!

Protect Your Art | Custom Canvas Framing by Framous Pictures

Ready to give your artwork the spotlight it deserves?

Custom canvas framing from Framous Pictures ensures your artwork looks amazing and lasts a lifetime. With personalized options and expert craftsmanship, your art gets the attention it deserves.

Showcase Your Art in Style

Guide to Common Canvas Stretching Issues and their Solutions 150 150 admin

Guide to Common Canvas Stretching Issues and their Solutions

Canvas Stretching Issues

Ever noticed a painting on a canvas that looks a bit wobbly or uneven? Maybe the corners seem a little loose. Or it has weird marks you can’t quite figure out.

These are common canvas stretching issues that many artists encounter, when canvas isn’t stretched right.

Canvas stretching is a skill that helps artists to create the perfect surface for their artwork. Additionally, it influences how long your artwork lasts. Thus, it’s important to understand the common issues that may arise during the process.

Framous Picture Framing provides you with a complete guide on canvas stretching issues with their expert solutions. So, let’s get started:

7 Common Canvas Stretching Issues and their Solutions:

1. Warping:

Warping occurs when the canvas is not stretched properly or sometimes because of changes in humidity or temperature. This makes your canvas damp or too dry. Thus, it bends or gets slightly twisted, causing the canvas surface to look uneven.

Solution: Use kiln-dried stretcher bars and carefully adjust the tension. This prevents the canvas from warping, ensuring it stays flat and even.

2. Sagging or Loose Corners:

It happens when the canvas gets loose or sags in the middle or when the corners of the canvas are not securely attached to the frame. Thus, the canvas gets loose and unstretched because of insufficient tension, leading to the difficulty and distortion in making your artwork.

Solution: Secure corners tightly using a combination of traditional stretching methods and modern adhesives. Moreover, apply precise tension adjustments to avoid sagging. This technique keeps the canvas tight and prevents the middle from drooping.

3. Visible Staple Marks:

Staple marks are small holes or marks left on the canvas when it’s stretched using staples.  When it is stretched, it gets those staple marks more visible.

Solution: Use hidden stapling techniques during canvas stretching. It leaves the canvas free of visible staple marks, resulting in a clean and professional finish.

4. Wrinkles and Bubbles:

Wrinkles and bubbles form when the canvas has creases or air pockets. These bubbles distort the smooth surface of the canvas. Just like a bedsheet might have wrinkles if not spread out properly.

Solution: Stretch the canvas evenly and meticulously to avoid wrinkles and bubbles. Further, take special care during the stretching process to ensure a smooth and flawless finish.

5. Canvas Overstretching:

When you stretch a rubber band too much, it might lose its shape. Similarly, overstretching occurs when the canvas is pulled too tightly. Thus, it distorts the whole image.

Solution: Find the right balance during canvas stretching. Moreover, avoid pulling the canvas too tightly to prevent distortion, proving the artwork maintains its intended shape and proportions.

6. Insufficient Canvas Coverage:

Imagine trying to wrap a gift with too little wrapping paper. There might be some parts that are not covered. Likewise, insufficient coverage occurs when there’s not enough canvas around the edges of the frame.

Solution: Ensure generous canvas coverage around the frame. This prevents any compromise in the structural integrity of the artwork. Additionally, it makes it look complete and professionally framed.

7. Poor Quality Stretching Materials:

Poor quality materials can lead to the canvas decline prematurely. If you build a house with weak materials, it might not last long. Similarly, using low-quality materials for stretching canvases can make them wear out faster.

Solution: Exclusively use high-quality, sustainably sourced materials for stretching canvas. This guarantees the longevity and preservation of the artwork while preventing premature collapse.

Choose Framous Picture Framing for Professional Canvas Stretching Services

  • Our skilled team takes special care to stretch the canvas evenly. We ensure avoiding canvas stretching problems; like wrinkles and bubbles, for a smooth and flawless finish.
  • We use special wood bars and adjust the tension carefully to prevent warping.
  • Using the latest techniques, we make sure to secure the corners tightly. So that your canvas stays tight and doesn’t droop.
  • Our experts use a method where the staples are hidden. This leaves your canvas clean and free of visible marks.
  • We ensure there’s enough canvas around the frame, so your artwork is fully covered. Thus, making it look complete and professionally framed.
  • We prioritize using high-quality materials to ensure your artwork stands the test of time.

Elevate Your Artistry with the Perfect Framing in Perth!

Framous Picture Framing specializes in flawless canvas stretching! Secure the longevity and beauty of your artwork with our custom framing solutions.Contact us or simply pop in to visit us at our store locations.

Why You Should Frame Autographs and Autographed Items? 150 150 admin

Why You Should Frame Autographs and Autographed Items?

Frame Autographs

Autographed items hold a special place in our hearts. It offers a personal connection to our favourite figures. Whether it’s the signature of an athlete, musician, or another public figure. The uniqueness of an autograph makes it a cherished possession.

In this article, we’ll explore the importance of frame autographs. Exploring how it preserves your valuable memorabilia and enhances its longevity.

You Should Frame Autographs and Autographed Items

Why Autograph Framing Matters?

Framing autographs isn’t just about aesthetics. It’s a careful process that involves different factors. Like the type of picture, display conditions, lighting, humidity, temperature, and cost.

Improper framingnot only reduces the visual appeal. But can lead to irreversible damage. Hence, affecting autograph picture frame market value.

Key Benefits Frame Autograph
Valued Personal ConnectionsAutographs are personal messages from your idols, exclusively for you. Frame preserves the lasting connection.
Protection Against ElementsShield autographs from heat, light, and moisture to prevent fading, bleeding, and Mold.
Hang with PrideDisplay autographed memorabilia proudly with various framing styles from Framous Pictures.
Preserve the Monetary ValueSecure framing maintains autograph integrity, maximizing resale potential and value.
Creative Framing OptionsExplore various styles, finishes, and materials with reversible framing for future flexibility.
UV Protection for Long LifeFraming shield autographs against UV damage.
Safety Against Humidity & HeatExpert techniques safeguard autographs from atmospheric conditions.

Can Cheap Framing Ruin Your Autograph?

The Risk of Improper Framing

Absolutely! Using a cheap, off-the-shelf frame can seriously harm your frame autographs.

The term “cheap” here isn’t just about low cost. It’s about avoiding generic products. Think of your autograph frame as an investment. Not just an extra expense.

Without proper framing, your autographed photo or document is vulnerable to various damages:

  1. Discolouration: Light sources and UV rays cause fading.
  2. Mat Burn: Areas in contact with the mat turn brown over time.
  3. Dampness and Mold: Humidity leads to Mold growth.
  4. Cracking and Peeling: Extreme temperature changes damage your autograph.

This damage isn’t immediately visible. But once noticed, it’s often irreversible.

Your frame autograph’s market value can be permanently reduced. Even if your autograph is away from direct sunlight. Both outdoor and indoor UV light rays pose risks.

While aesthetics matter, protection is key. So, when selecting an autograph photo frame. Consider both its aesthetic appeal and its ability to protect your autograph.

Pick the Right Autograph Framing Technique

When it comes to framing, there are three main categories you’ll encounter:

  1. Regular Framing
  2. Conservation Grade Framing
  3. Museum Quality Framing

The key difference among these frame autographs types lies in the glass they use. Glass is the primary barrier against potential damage to your autographed photo. While regular framing is more budget-friendly. conservation grade offers a good balance. And museum-quality framing provides good protection for your valued collectibles. Like a frame for autographed jersey.

Consider your priorities and budget when choosing the framing that suits your needs.

1. Regular Framing: Budget-Friendly

Regular framing is the most budget-friendly option. It uses standard glass.

If your goal is to maintain your collectible’s appearance over the years. Regular framing might not be the best choice. Weigh the cost against the long-term preservation of your autographed framed.

Here’s a breakdown of its pros and cons:

Pros

  • Protects against dust and fingerprints.
  • Competitive pricing.

Cons

  • Blocks minimal UV light.
  • Susceptible to heat and humidity.
  • Non-reflective glass may cause glare.

2. Conservation Grade Framing: Protection At Best Price

Conservation-grade framing is an excellent choice for items stored at home. Especially in temperate climates. It falls within the higher quality market value framing.

This is the best frame for autographed picture with personal and sentimental value. It balances between protection and cost-effectiveness. Also, maintaining the item’s condition.

Here’s what you need to know:

Pros

  • UV coating for light protection.
  • Increasingly cost-effective.

Cons

  • Limited reflection-free viewing.

3. Museum Quality Framing: Long-term Protection

It is the most expensive option. Museum-quality framing offers major value for your investment.

The higher initial cost is an investment in the long-term preservation of your autograph. Museum-quality framing not only ensures top-notch protection. But also delivers a clearer, brighter display.

Here’s what makes it stand out:

Pros

  • Blocks 99% of UV light.
  • Lowest reflection, best clarity.
  • Preserves autographs for generations.
  • Detailed clarity allows you to pick out even the smallest features of your autograph.

Cons

  • Higher upfront cost.

Matting

The glass in your frame is important. But it’s not the only piece in the framing puzzle. It’s important to prevent your photo from sticking to the glass.

If a photograph touches the frame’s glass condensation from heat. It can lead to 2 issues: water damage or sticking to the glass. This makes removal impossible without peeling or tearing.

This is where matting steps in.

An autograph frame mat board acts as a barrier between the glass and your item. So, it doesn’t come into direct contact with the glass surface. Additionally, using a board adds to the display by adding depth and shades to your photos. Improving their aesthetic appeal.

However, matting comes with potential risks.

How Matting Can Harm Your Picture

The material of the mat board can cause irreversible damage to your photo. Known as acid burn.

A. What is Acid Burn?

Over time, some autograph picture frame mat boards go through a degradation process. Gradually leaking acid onto your item.

This is a slow process,

It is dependent on the mat board’s material, humidity, and temperature changes. While can see it on the item’s edges. Which shows obvious browning where your item has touched the board.

The best way to prevent mat burn is to use acid-free matting.

B. How to Avoid Mat Burn?

1. Acid-Free Matting

The majority of mat boards today are initially acid-free. However, this category is not lignin-free. Lignin leads to mat burn over time.

If your mat board is not lignin-free. Its replacement every few years is necessary to avoid mat burn.

2. Lignin-Free Matting

Also known as conservation matting, these boards are completely lignin-free. However, they do eventually degrade and require replacement. But this typically happens over decades.

3. Museum-Grade Matting

Museum-grade boards are made of cotton. Fade and bleed-resistant, naturally acid-free, and lignin-free.

It has helped in preservation for hundreds of years. Lasting across generations. It is highly recommended for framing autographed photos, historical pictures and documents.

Mounting Your Autographs

Always ask how your pictures will be mounted inside the autograph display frames.

If you don’t!

Framers might use glue or tape, causing irreversible damage. Find a framer who can do the work the way you need.

How to Mount Your Autograph Frames | 5 Ideas

1. Double Matting

Ask for double or triple matting with different colours. Two or even three mats in different colours give your framed pieces depth and sophistication.

The bottom one will be visible only at the border. Creating a unique and consistent look.

2. Multiple Openings

Merge more than one item in separate openings to create a visually rich experience. Combine photographs with other memorabilia for a unique display.

Frame more than one piece with separate openings in your top mat. Combine photos with clips, programs, letters, and tickets for a richer visual experience.

3. Shadow Boxes

If you have thicker items like books or sports memorabilia, ask for shadow boxes. They add a creative touch to displaying autographed objects like autographed jersey frame.

A professional framer can explain how items will be mounted inside the frame. Using tape, photo corners, plastic lines, etc.

4. Fillets

Attach small pieces of thin frame to the inner border of the mat opening for a decorative edge. This is called fillets. It’s a simple way to enhance the overall look.

5. Floating

Opt for float mounting when using two mats. Your collectible appears suspended. Creating a visually appealing effect.

Improve the look of your framed autographs by using these simple tricks. Remember, the right framing can make a great difference.

You Need Expert Touch to Frame Unconventional Items

Framous Picture stands out as an expert in handling and framing autographed memorabilia.

Sometimes, autographs find their way onto unconventional materials like napkins, jerseys or merchandise. While these items hold rich stories and memories. They require quality framing to ensure their longevity. For instance, give your autographed jersey frame a special place on your wall with a custom frame.

Framous Picture offers expertise in preserving your treasured autographed memorabilia.

Go for Timeless Preservation

Preserving your autographs is worth the investment.

Custom framing may cost more initially. But offers lasting protection and durability compared to off-the-shelf options.

Choose quality for timeless preservation.

Preserve Your Autographs with Framous Pictures

Discover the perfect frame for your valued autographs. Explore creative options, ensure long life with UV protection, and trust industry-leading expertise.

Get a Quote from Framous Pictures

15+ Custom Framed Gifts Ideas to Frame the Spirit of Christmas 150 150 admin

15+ Custom Framed Gifts Ideas to Frame the Spirit of Christmas

Custom Framed Gifts 20 Christmas Gift Ideas for 2023

Welcome to the season of joy and giving! The festive season is upon us. If you’re on the lookout for unique and heartwarming Christmas gifts. Look no further!

This year, why not consider the timeless charm of custom framed gifts?

Not only are they personal and thoughtful. But they also add a touch of warmth to your holiday celebrations. In this blog post, we have curated 20 delightful Christmas gift ideas that involve the magic of custom framing. From cherished memories to artistic creations. These gifts are sure to bring a smile to your loved ones’ faces.
Let’s unwrap the joy of 15+ Christmas gift ideas to spread the holiday cheer.

Custom Framed Gifts | 15+ Christmas Gift Ideas for 2023

1. Framed Polaroids

Capture memories in a charming way by gifting a collage frame filled with Polaroids. Alternatively, framed mini-Polaroids make for delightful ornaments on the Christmas tree. Turning your tree into a gallery of precious moments.

Framed Polaroids

2. Framed Family Christmas Recipe Card

Share the secret ingredient to a perfect holiday with a framed family Christmas recipe card.

For a Christmas twist, frame a recipe for a special holiday dish. Like “Mom’s Classic Christmas Roast.” Picture the joy of having the cherished recipe displayed. Not just a guide for cooking. But also a festive decoration and a timeless keepsake.

It’s a sweet reminder of family traditions.

3. Framed Vinyl Record or Album Cover

For the music enthusiast, frame their favourite vinyl record or album cover. It’s a stylish and nostalgic gift that adds a touch of musical magic to any room.

For a Christmas vibe, frame a vinyl with a classic holiday album. Like “Jingle Bell Rock” or “A Charlie Brown Christmas.” Imagine the festive atmosphere as the iconic cover hangs on the wall. Bringing musical magic to your holiday décor.

It’s a cool and easy way to blend the love for music with the spirit of Christmas.

4. Framed Pet Portrait

Celebrate furry family members with a framed pet portrait. Whether it’s a playful cat or a loyal dog, turning a cherished pet photo into a framed masterpiece is a heartwarming gesture.

For a Christmas twist, frame a photo of your pet wearing a festive holiday accessory. Like a tiny Santa hat or reindeer antlers. Imagine the joy of showcasing your pet’s holiday spirit in a framed portrait. Adding a touch of festive cheer to your home.

It’s a simple and delightful way to include your pet in the Christmas celebrations. And create lasting memories.

Framed Pet Portrait

5. Framed Handwritten Recipe

Transform a loved one’s cherished recipe into a work of art. Custom picture frames of a handwritten recipe. Adding a personal touch to their kitchen decor and preserving family traditions.

For Christmas vibes, frame a handwritten recipe of a favourite holiday treat. Like grandma’s famous gingerbread cookies. Imagine the joy of having the recipe displayed in the kitchen, adding a festive touch to the holiday baking tradition.

6. Framed Photo Collage

Compile a collage of special moments and frame it to create a personalized gift that tells a story. From family vacations to milestone celebrations. It’s a visual journey down memory lane.

In your framed photo collage. Add Santa pics from different years to see how smiles and holiday spirit change over time. Highlight special moments with Christmas lights to make your collage cozy and festive. Picture the family wrapped up in twinkling lights, capturing the magic of holiday evenings in one frame.

Dedicate a section to Ugly Sweater fun. Add pics of the family proudly wearing wacky holiday sweaters. Capture the excitement of Christmas morning with candid shots of gift exchanges. Imagine the genuine reactions and laughter frozen in time as presents are unwrapped.

Framed Photo Collage

7. Shadow Box with Mementos

Create a unique gift with a shadow box filled with Christmas mementos. From holiday ornaments to cherished trinkets. This three-dimensional display becomes a festive time capsule. Capturing the spirit of the season.

Apart from Christmas. You can also gather trinkets and souvenirs to create a unique shadow box. Whether it’s concert tickets, seashells, or special notes. This framed display captures the essence of cherished memories.

8. Framed Family Portrait or X-mas Card

If you’ve spent a Christmas together or received a heartwarming Christmas card from the family. Why not turn those memories into a custom framed gift?

Frame the moments of shared laughter. Give a festive twist to the classic family portrait by adding Christmas-themed elements. Santa hats, twinkling lights, and holiday cheer.

This festive-framed family portrait becomes more than just a decoration. It becomes a cherished memory on display. It’s a reminder of the joyous times spent together.

Frame it all for a jolly keepsake.

9. Embroidered Wall Art

Turn a favourite quote or meaningful words into a piece of art with embroidered wall art. It’s a thoughtful and elegant gift that adds a touch of sophistication to any space.

For a festive twist, consider framing a quote from a beloved Christmas carol, such as “Silent Night” or “Let It Snow.” It’s a simple and thoughtful way to infuse the Christmas spirit into your loved one’s home.

10. Handwritten Letter in a Frame

Capture the essence of heartfelt emotions by framing a handwritten letter. Whether it’s a love note or a letter of appreciation. Capture the holiday warmth by framing a handwritten Christmas letter.

Imagine a heartfelt note to a loved one expressing gratitude or sharing festive wishes beautifully displayed in a frame.

For a festive touch, frame a handwritten letter to Santa from a child in the family. Picture the joy of having this precious letter showcased. It becomes a tangible expression of sentiment.

11. Framed Vintage Posters

For the retro enthusiast, custom frames of vintage posters of classic movies, bands, or iconic artwork. It’s a stylish addition to any room, bringing a nostalgic vibe.

Give a retro twist to Christmas décor by custom framing vintage posters. Imagine classic holiday movie posters. Like “It’s a Wonderful Life”. Or iconic artwork like vintage Coca-Cola Christmas ads elegantly displayed. Bringing a nostalgic and stylish vibe to your festive setting.

It’s a cool and easy way for retro lovers to celebrate the season with a touch of yesteryear.

12. Floating Frame Display

Create a modern and minimalist look with a floating frame display. Imagine a minimalist design framing festive artwork like a Christmas tree silhouette or holiday greetings. This design showcases the artwork as if it’s suspended. Adding an artistic touch to any wall.

13. Pressed Flower Artwork

Bring the beauty of nature indoors with pressed flower artwork in a custom bed frame. Frame delicate pressed flowers for a stunning and timeless gift that captures the fleeting beauty of blooms.

Imagine a framed wreath of pressed Christmas flowers. Like poinsettias or holly. Creating a festive and natural decoration. It’s an easy and beautiful way to capture the fleeting beauty of blooms and add a touch of the outdoors to anyone’s holiday decor.

14. Cross-Stitch Family Portrait

Add a touch of nostalgia with a cross-stitch family portrait.

This handmade gift is not only charming but also reflects the warmth of family bonds. Picture a handmade depiction of your family members framed on the wall. Capturing the warmth of your holiday celebrations.

It’s a charming custom photo frame and personal gift that adds a touch of handmade love.

15. Framed Book Cover Art

Gift the bookworm in your life a framed literary masterpiece. Imagine their favourite Christmas-themed book cover or festive literary artwork elegantly displayed.

A framed cover of “A Christmas Carol” or a festive illustration from a beloved holiday story. Perfect for bringing a touch of literary magic to the holiday season.

16. Framed Christmas Art

Spread the festive cheer by gifting framed Christmas-themed art. Choose a beautiful holiday illustration or a print that captures the magic of the season.

For example, frame a whimsical Santa Claus artwork or a cozy winter scene. These framed Christmas artworks become instant decorations. Adding a joyful and artistic touch to your friends or family home.

17. Framed Christmas Song Lyrics

Turn your loved ones’ favourite Christmas tunes into visual delights by framing song lyrics. Choose a line from a beloved carol or a festive song that brings back warm memories. Frame it beautifully. And gift it to your friends or family home. To infuse the space with musical merriment with custom a frame signs.

For instance, frame lyrics from “Jingle Bells” or “White Christmas.” These framed lyrics not only celebrate the magic of Christmas songs. But also serve as a delightful decoration for holiday festivities.

18. Framed Vintage Christmas Sheet Music

Embrace the vintage charm of Christmas with framed sheet music.

Find antique or vintage Christmas sheet music. Frame it and create a classic and timeless gift. Imagine framing the sheet music for “Deck the Halls” or “Silent Night.” These framed vintage pieces add a touch of nostalgia and musical elegance to your holiday gifts.

Making it feel like a timeless celebration.

Framed Vintage Christmas Sheet Music

19. Framed Christmas Movie Posters

Bring the magic of Christmas movies to your friends or family home by gifting framed movie posters.

Frame posters from your favourite holiday films. Such as “Home Alone” or “A Christmas Carol.” It’s a fun and festive way to celebrate the season. With a nod to their favourite on-screen holiday moments.

20. Framed Poems & Literature Excerpts

Add a literary touch to your Christmas gifts by framing poems or literature excerpts.

Choose a festive poem or a heartwarming excerpt from a favourite holiday story. For example, frame a snippet from “A Visit from St. Nicholas” or a line from Charles Dickens’s “A Christmas Carol.”

These framed literary gems add a touch of classic literature to holiday celebrations.

Frame The Spirit Of Christmas

As we wrap up our journey through these delightful and Christmas framed gift ideas. The essence of the holiday season comes alive.

From capturing precious memories in framed Polaroids to turning handwritten recipes into works of art. Each idea is a unique and thoughtful way to spread joy.

May your holidays be filled with laughter, love, and the magic of framed memories!

Frame Joy with Framous Pictures

Transform your cherished Christmas memories into timeless decorations with Framous Pictures. Your go-to custom framing near me. Our custom frames online add a touch of holiday magic to every corner of your home.

Frame the moments that matter most. After all, the best gifts are the ones you can hang on your wall.

Happy framing and Merry Christmas! 🎄✨

How To Frame A T Shirt? Framing Art 150 150 admin

How To Frame A T Shirt? Framing Art

frame a t shirt

Clothing often holds sentimental value, reminding cherished memories, interests, and experiences. T-shirts, in particular, become tangible reminders of significant moments in our lives. Like the last day of school, college and university. All those fellow’s signatures, notes, jokes, ink spots and teachers’ advices.

Indeed the most beautiful memory. But what to do after getting all these special moments on T-shirts. Let Framous Picture Framing teach you about how to preserve the t-shit or how to frame a t-shirt? This practice is pretty sustainable for a longer period of time.

Framing A T-Shirt | Transforming Memories into Art

Instead of leaving t-shirts tucked away in drawers, framing T-shirts is a unique way to preserve and showcase it as a works of art. In this guide, we’ll explore the “how to frame a t shirt” ensuring a visually stunning display that replays memories and emotions.

Significance of Framing T-Shirts

Framing a T-shirt is a creative way to express personal style and honor of the shirt’s importance. Whether it’s a concert tee, a sports jersey, or a souvenir from a memorable trip, each shirt tells a story. Think of an autographed t-shirt from your favorite actor. It preserves the physical form of the shirt but also captures the essence of the memories associated with it. Framing is a unique way to cherish a piece of clothing that tells a story.

Every time, you see it, you simply love it.

Since 1985, Framous Picture Framing, located in the heart of Midland, has been giving client’s peace of mind for all their framing requirements either large or small.

How To Frame A T-Shirt | Considerations

Selecting a suitable picture frame for a shirt is always crucial, followed by carefully folding and arranging the shirt to showcase its design or graphics, and securing it with stitches or fabric-friendly adhesive for a professional and aesthetically pleasing outcome.

Frame and Matting

Selecting the appropriate frame and matting is crucial for enhancing the visual impact of the T-shirt and protecting it from potential damage. Complementary elements such as photographs, concert tickets, or handwritten notes can be arranged alongside the shirt to enhance the storytelling aspect of the display. Carefully arranging these elements contributes to a visually appealing presentation.

Size for a Shirt

When selecting a frame for a shirt, the size is paramount. The most common and recommended size for framing a shirt is a shadow box frame that is at least 18×24 inches or larger. This provides ample space to showcase the shirt while allowing for proper framing techniques. The frame should be large enough to fully display the shirt without it appearing cramped or stretched.

For large shirts, a frame size of 80cm x 60cm is recommended. The frame should provide a comfortable fit around the chest and neck area, allowing freedom of movement without being too tight or too loose. Referring to the specific size chart provided by the brand or retailer when purchasing a large shirt ensures the most accurate frame size.

Proper Shirt Storage

Clean and dry shirts are important to prevent fabric damage or mold growth over time. Folding shirts helps maintain shape and prevents stretching, while using acid-free tissue paper prevents creases and minimizes contact between fabrics. Choose a cool, dry, and dark location to protect shirts from sunlight, humidity, and temperature fluctuations. Avoid plastic bags, opting for breathable fabric garment bags or cotton storage bags that allow airflow.

Rotate shirts periodically to prevent prolonged pressure on specific areas. It can result in fabric destruction or creasing. Make sure to keep the texture of t-shirt intact by practicing healthy preserving methods.

Displaying Fabric in a Frame

Displaying fabric in a frame is a creative way to showcase unique textiles like embroidery, fabric art, or sentimental fabrics. Choose a frame that fits the fabric’s size and style, and prepare the fabric by ensuring it is clean and wrinkle-free. Mount the fabric on a backing board or mat board, cut to fit the frame, using acid-free adhesive, double-sided tape, or stitching.

Secure the fabric in place using the backing or hardware. Insert the framed fabric into the frame, ensuring it is centered and positioned as desired. Display the framed fabric in a suitable location away from direct sunlight and humidity.

Materials and Tools

Choose a durable frame for your T-shirt, use acid-free mat board for a border, and secure it with stainless steel pins or fabric-friendly adhesive. Place acid-free tissue paper between folds to prevent creases. Trim the mat board and mounting board to the desired size, and attach decorative elements like photographs or concert tickets using adhesive or pins. Use tissue paper to prevent creases and protect the fabric.

Preparing the T-Shirt for Framing

Properly preparing a T-shirt for framing involves washing and ironing it to remove dirt, wrinkles, and creases. Placing acid-free tissue paper inside the shirt provides support and prevents sagging. Carefully folding the shirt, securing it with pins or fabric demanding gadgets, and placing it in a frame designed for textiles or deep frames complete the preparation process.

Secure the T-shirt frame tightly to prevent shifting or wrinkling. Hang it in a suitable location, away from direct sunlight or excessive humidity, to preserve its condition. This process ensures a visually appealing and long-lasting display of your T-shirt.

Arranging and Positioning the T-Shirt within the Frame

Arranging and positioning a T-shirt within the frame requires choosing a suitable backdrop, preparing the shirt, considering placement options (hanging, folding, or laying flat), using props or accessories if desired, and ensuring proper lighting. Fine-tuning the composition and making necessary adjustments contribute to a visually appealing arrangement. Don’t forget to play with different angles and think something out of the box. Check symmetry, alignment and overall impact with decoration or furniture.

Conclusion

Framing a T-shirt is a bit tough yet the most beautiful way to preserve your most loveable memory. It adds the touch of togetherness, style and constant vibe. A vibe that you feel with emotions. Framous Picture Framing is supporting best moments in a best way of display. This guideline is especially for those who love to frame their moments with care and emotions. Read and get the answer of how to frame a t-shirt. Keep the shirt safe and protected. No more wonder, t shirt frame Australia or t-shirt posters for sale, we got yaa…

Check our gallery and get what you desire for…

The Art of Framous Picture Framing

The Basics of Canvas Framing 150 150 admin

The Basics of Canvas Framing

canvas framing

How are canvas boards framed? Framing a canvas painting or framed canvas prints might seem like a tricky task. Especially if your artwork is unique or comes in a rolled format.

Also, selecting the right frame for your canvas art is important as well. It can either lift your artwork or make it seem out of place.

In this guide, we’ll break down the canvas framing process into simple steps. To achieve that polished, professional look for your canvas art. Whether you have a stretched canvas or a rolled print.

This guide simplifies the process. Read on to learn the easy-to-follow instructions.

Why is Canvas Framing Important

  • What is the use of canvas frame?

Canvas framing involves mounting your artwork onto a frame. This offers several advantages.

  1. It provides a long life for your artwork.
  2. It shields your artwork from dirt, dust, and damage.
  3. It gives a professional and polished appearance to your artwork.

This process involves stretching and securing the canvas onto a frame. Giving protection and an attractive display option. Affordable canvas framing near me ensures the protection of your artwork.

Canvas frames come in various styles and colours. Which allows you to match framed canvas wall art perfectly with your decor.

Types of Canvas Frames

framed canvas prints
  • What type of framing for canvas?

There are two main types of canvas frames.

1. Gallery-Style Frames

Gallery-style frames consist of side rails, a top rail, and a backboard.

The side rails attach to the top and bottom of the artwork. With the top rail connecting to the side rails. The backboard is then secured. Providing a classic and protective framing option.

2. Floating Canvas Frames

A floating frame for canvas is similar to a gallery-style frame but lacks a backboard.

The artwork is stretched over a spacer bar. Which creates the illusion of it “floating” inside the frame. This modern option is ideal for those seeking a contemporary look.

Choose the Right Frame: Factors to Keep in Mind

framed canvas wall art

When selecting a canvas frame, consider the following factors:

  1. Artwork Style: Choose a frame that matches the style of your artwork. Clean lines for modern pieces and ornate frames for traditional art. Or choose a wood canvas frame to add rustic charm to your artwork.
  2. Frame Colour: Select a colour that matches the artwork without overshadowing it. When in doubt, black is a safe and versatile choice.
  3. Frame Size: Ensure the frame is proportionate to the artwork. Avoid a look that is too small or too large. When uncertain, choose a slightly larger frame. Also, a stretched canvas with a wood frame adds stability to larger canvas artworks.

How To Frame A Canvas?

If you plan to frame your artwork, keep these simple tips in mind:

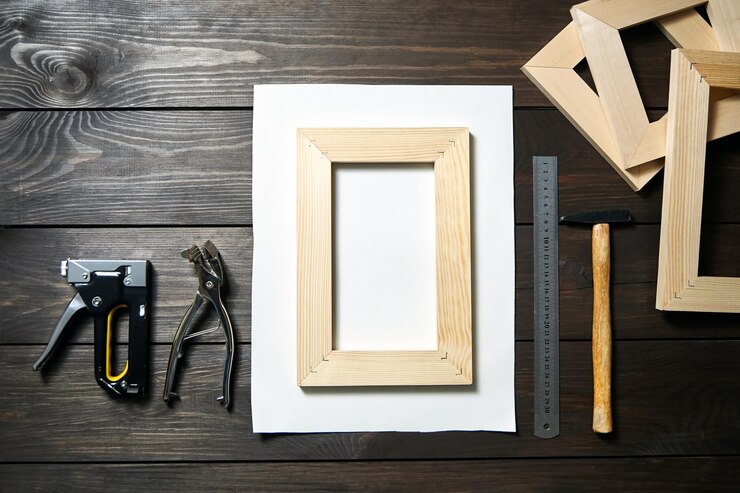
  1. Gather the Right Tools: Prepare a measuring tape, a level, a hammer, nails, and a saw.
  2. Measure and Cut: Measure the artwork and cut frame pieces to size. Use a level to maintain straightness.
  3. Assembly: Attach side rails to the artwork’s top and bottom. Connect the top rail and add the backboard to complete the frame.
  4. Floater-Style Frame: For floating frame canvas. Follow the same assembly steps and stretch the artwork over the spacer bar before inserting it into the frame.

DIY Canvas Framing Tutorial

how to frame a canvas

For detailed DIY canvas framing instructions. Read the following methods with step-by-step instructions.

For a Store-Bought Frame

Materials Needed
Tape measure
Store-bought canvas frame
Screwless canvas clips or offset clips
Screwdriver
Flat surface
Pencil
Drill (if using offset clips)
Canvas Artwork

Step 1: Measure Your Canvas

  1. Get a tape measure and measure your canvas.
  2. Measure the height, width, and thickness (depth) of the canvas.
  3. Write down these measurements accurately.

Step 2: Buy a Canvas Frame

  1. Go to a craft store or check online for a canvas frame.
  2. Find a frame that matches the length, width, and thickness of your canvas.
  3. Choose a frame that contrasts with your artwork but doesn’t distract from it.

Step 3: Choose and Attach Clips

  1. Decide whether you’ll use screwless canvas clips or offset clips.
  2. If using offset clips, measure the canvas’ frame width to pick the right size.
  3. Attach the clips evenly around the canvas edges.

Step 4: Place Canvas in Frame

  1. Lay the canvas face down on a flat surface.
  2. Put the frame face down with the canvas inside, decorated side down.
  3. Be careful not to scratch the artwork; handle it gently.
  4. Make sure the canvas fits tightly inside the frame.

Step 5: Attach Screwless Clips

  1. If using screwless clips, slide them between the frame and canvas edge.
  2. Pull the clip over the stretcher bar and press it down firmly.
  3. Space the clips evenly around the canvas.

Step 6: Screw Offset Clips (Alternative)

  1. If using offset clips, position them at the centre of each side.
  2. Mark their positions with a pencil and drill pilot holes.
  3. Set the clips over the holes, touching the canvas.
  4. Screw the clips into the frame to secure the artwork.

Step 7: Final Check

  1. Turn the painting over carefully.
  2. Ensure the frame fits snugly around the canvas.
  3. Adjust the canvas clips if needed.
  4. Make sure you like how the frame matches your artwork.

For Rolled Canvas

Step 1: Measure The Height and Width

Measure the height and width of your canvas.

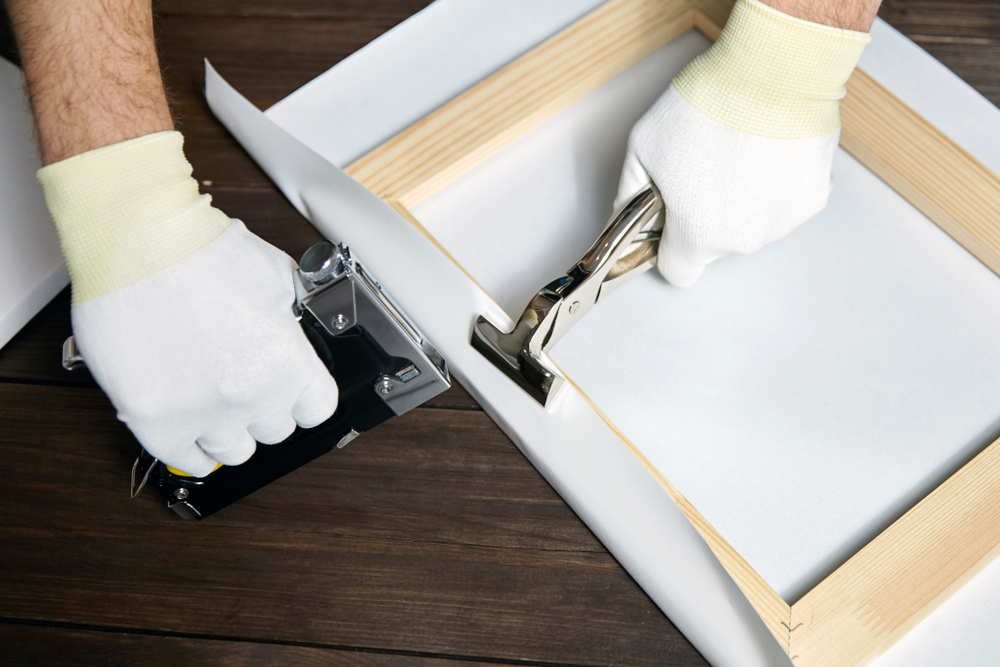
Make sure there’s enough canvas to fold and staple to the stretcher bar.

If excess canvas is present. Leave at least 2 inches to fold over and stretch.

Step 2: Place Canvas Face Down on Clean Surface

Lay your canvas face down on a clean surface.

Measure the distance between corners to ensure even placement.

Step 3: Fold the Canvas

Starting on the shorter side. Fold the excess canvas over the stretcher bar.

Use canvas pliers or begin stapling in the middle of the folded canvas.

Step 4: Turn Over and Repeat

Turn the canvas 180 degrees and repeat the folding and stapling on the opposite side.

Continue until all sides are done.

Step 5: Pull the Canvas

With a staple in the middle of each side. Slightly pull the canvas and add staples on either side, evenly spaced.

Step 6: Fold the Corners

Tuck one side under the other at the corners, pulling tightly.

 Cut the corner tip, fold it, and staple it to the frame.

Step 7: Place in Final Frame

Once stretched, place the canvas into its final frame.

For Stretched Canvas

Step 1: Choose the Right Frame

Select a wood, metal, or floater frame with a rabbet larger than the canvas thickness.

Step 2: Attach Canvas to Frame

For canvas wood frame. Use points at the required depth.

For metal frames. Use spring clips if the rabbet is deeper than the canvas stretcher bar.

Step 3: Adjust for Floating Effect (Optional)

If you want a floating frame canvas effect. Use screws or clips to attach the canvas. Leave a small gap between the canvas and the frame.

Tips for Framing Your Canvas Artwork

When framing canvas artwork, remember these essential points:

  1. Ensure the canvas is stretched tight and trimmed before framing.
  2. Measure carefully for a neat fit. Especially with stretched canvas.
  3. For canvas boards. Add a protective barrier between the artwork and the frame.
  4. If you used acrylic paint. Use UV-resistant glass or plexiglass to prevent fading.

With these considerations. You’ll create beautiful, framed canvas art. That will beautify and protect your artwork for years to come.

Bonus YouTube Tutorials

Here are some helpful YouTube video links that provide step-by-step tutorials on framing canvas. Feel free to click on the links.

  • How to Frame a Canvas Panel

Watch Video

  • Canvas Stretching Lesson

Watch Video

Watch Video

  •  Cheap Way To Frame Canvas Artworks

Watch Video

Final Words

Now you know the basics of canvas framing. It’s time to choose the perfect frame for your canvas artwork. Follow these guidelines. And your framed canvas will tell your aesthetic sensibilities.

Your Memories Deserve the “Framous” Touch

📞 Call now or visit our website to schedule a consultation. Explore the possibilities of custom framing at its finest.

Tips for Choosing the Best Coastal Wall Art for Your Home 150 150 admin

Tips for Choosing the Best Coastal Wall Art for Your Home

Best Coastal Wall Art for Your Home

Imagine waking up to the soothing sounds of waves crashing on the shore. The warmth of the Australian sun is on your face every day.

While daily beach visits may be a distant dream.

Bringing the coastal vibe into your home is easier than you think.

Coastal artwork, particularly framed prints, can transport you to your favourite beaches. Imagine coming home to a space that not only reflects your personality. But also transports you to the coastal serenity.

If you’ve been yearning for a change, a touch of the coast might be just what you need.

In this guide, we’ll explore expert tips on choosing the best coastal wall art for your home.

Best Coastal Wall Art for Your Home | 15 Ideas

Idea 1. Australian Coastal Art Prints

Opt for coastal artwork prints featuring popular Australian locations, like the secluded Wategos Beach in Byron Bay.

Capture the essence of the Aussie summer with framed art prints showcasing iconic coastal wall art Australia, such as Kangaroos, Banksia Trees, or Pandanus Palms.

green bay beach western australia

Idea 2. Abstract Coastal Artwork

Choose aerial beach photo prints for modern coastal wall art and an abstract touch. Use colours like seafoam green, sandy beige, and ocean blues to evoke the feeling of being by the water.

Aerial drone photography can provide soft pastel tones and subdued warm colours. You can also choose abstract coastal artwork for walls creating a unique artistic effect that sets the tone for the room.

abstract coastal artwork

Idea 3. Ocean Wave Canvas Prints

Choose large coastal canvas wall art prints depicting the mesmerizing movement of ocean waves. The subtle play of blues and whites will instantly transport you to the shore.

seascape coastal artwork

Idea 4. Seascape Photography

Opt for high-quality photography prints featuring expansive seascapes. These large coastal wall art images capture the vastness of the ocean, creating a sense of tranquillity.

seascape coastal artowrk australia

Idea 5. Nautical Charts and Maps

Incorporate framed nautical charts or vintage maps to add a touch of maritime charm. These best coastal wall art can be both visually appealing and educational.

coastal art prints australia

Idea 6. Shell and Coral Collages

Create a striking collage using real or artistic renditions of shells and coral. These pieces can add texture and a touch of nature to your walls.

large coastal wall art

Idea 7. Beach Sunset Coastal Artwork

Sunset scenes over the water are classic coastal motifs. Look for artwork that showcases the warm hues of a beach sunset, creating a calming atmosphere.

Best Coastal Wall Art

Idea 8. Weathered Wood Wall Sculptures

Integrate weathered wood sculptures or wall hangings that mimic driftwood. These pieces add a rustic, beachcomber feel to your space.

Idea 9. Surfboard Wall Decor

Hang decorative surfboards as unique and eye-catching wall art. This adds a playful and sporty element to your coastal design.

coastal artwork for walls surfboard

Idea 10. Underwater Photography Prints

Bring the underwater world to your walls with prints featuring marine life like colourful fish, sea turtles, and coral reefs.

wall art coastal

Idea 11. Boat and Sailboat Coastal Artwork

Display paintings or prints of boats and sailboats. This classic coastal element adds a touch of maritime adventure to your decor.

coastal artwork for walls

Idea 12. Coastal Typography Prints

Choose artwork featuring beach-inspired quotes or coastal typography. These pieces add a personal and whimsical touch to your walls.

Idea 13. Beach Path Photography

Select prints that capture the inviting allure of a sandy beach path leading to the water. This type of artwork creates a sense of invitation and exploration.

large coastal framed wall art

Idea 14. Coastal Holiday Resort Vibe

Adorn your walls with coastal-inspired images to evoke a perpetual holiday escape feeling.

Use a combination of white and raw timber frames to achieve a bright and natural aesthetic, perfect for any Australian décor.

Idea 15. Hang Your Favorite Destinations

Display framed artwork of your favourite beaches or coastlines to recall cherished memories.

Whether it’s Byron Bay, Bondi Beach, the Gold Coast, or Noosa Heads, choose prints that resonate with your favourite destinations.

Wategos Beach in Byron Bay coastal wall art Australia

Let’s go into the details.

Infuse Your Space With Best Coastal Wall Art

Space With Best Coastal Wall Art

Are you tired of the mundane?

Do you want to infuse a breath of fresh air into your living space?

Swap out generic wall décor for vibrant coastal wall art pieces.

The result?

The entire atmosphere will change. The walls will echo the rhythmic waves. And the room will feel like a seaside escape.

Tip 1. Plan Your Coastal Aesthetic

Your home is an extension of your personality, and your walls should reflect that.

Before diving into coastal wall art, understand your vision:

  • Serene and minimalist beach retreat?
  • Vibrant and eclectic coastal vibe?

Knowing your vision is the first step toward curated wall art.

Tip 2. Pick Your Coastal Colors Palette

The coastal palette is more than blues and whites.

Dive into soft blues, sandy beiges, and muted greens for a cohesive and inviting atmosphere.

Tip 3. Balance Themes and Styles

Coastal art spans various themes, from classic beach scenes to abstract interpretations.

Balance is key

  • Opt for complementing art over competing with dominant room themes.
  • Mixing styles creates a dynamic and visually interesting space.

Tip 4. Add Texture and Medium

The coast offers diverse textures, from smooth sand to rugged driftwood.

Choose framed coastal wall art with elements like seashells, ropes, or distressed wood for an authentic feel.

Tip 5. Match Art to Your Style

Coastal prints suit various interior styles. Scandinavian, modern, or featuring natural wooden surfaces. Find the perfect wall art coastal print to complement your unique décor.

Bring The Beach To Your Walls

Transforming your home into a coastal oasis is creating a space that reflects the serenity and beauty of the seaside.

By incorporating the right colours, elements, large coastal framed wall art, and patterns, each room can become a unique part of your beachside escape.

Explore the Framous Pictures collection for stunning coastal-inspired artwork. Click below to discover the perfect pieces that will bring the beach to your wall’s

Explore Coastal Artwork Now

Wedding Photo Framing| Framous Picture Framing 150 150 admin

Wedding Photo Framing| Framous Picture Framing

Wedding photo framing

What is one of the most important and memorable occasion in someone’s life? Unforgettable? Immortalized? Heavenly? Emotional?

Obviously, it’s wedding ceremony. When two people tie a knot of togetherness and take vows to always support, care and love. They sign the lifetime commitment to stay in all thick and thins.

Weddings brings cherished memories through photographs. To make these photographs stand out and evoke the same emotions, it’s vital to pay attention to the art of wedding photo framing. This article explores the significance of wedding photo framing and provides tips and ideas to make the most of this art form. Framous Picture Framing covers selecting the perfect frames and arranging photos in a way that tells a compelling story.

Wedding Photo Framing: Ultimate Memories to Be Cherished

Importance of Wedding Photo Framing

Wedding photo framing is more than just selecting a frame; it enhances the visual appeal of your images, adds depth to your storytelling, and creates a unique keepsake that will be passed down through generations. It is crucial for preserving memories, enhancing aesthetic appeal, and telling a story. The right frame protects these precious memories from dust, moisture, and physical damage, ensuring they remain intact for years to come. The frame can be a design element in itself, whether it’s a rustic wooden frame, an elegant silver frame, or a more modern one. Framing photos thoughtfully allows you to tell a story through a visual narrative.

Hustle of Right Frame

When framing wedding photos, consider your personal style and the wedding theme. Choose frames that match your taste, such as classic, vintage, modern, or rustic. Invest in high-quality frames made from wood, metal, or acrylic for better protection. Select frames that complement the colors in your photos and home decor, and ensure they are appropriately sized for your photos, as oversized frames can overwhelm smaller ones.

Arrangement of Wedding Photos Framing

Wedding is a biggest event of life. The frames of wedding photoshoot are as special as the pictures were clicked at that moment. Before reading further ideas, we suggest to complete homework of your choice according to your house. Wedding photos framing and printing is highly dependable to your likeness and decoration area’s theme.

Must create a map in your mind that where, how and what do you want as in your memory decoration. Either room, hall or gallery decide according to your mind map.

To create a compelling wedding photo display, consider organizing them chronologically, creating a visual timeline from preparation to the final farewell.

Create a collage display to showcase multiple moments in a single frame, such as candid shots or group photos. Highlight key moments by framing them separately, such as the first kiss, dance, or emotional exchange of vows.

Mix and match different frames and photo arrangements to add variety to your display. Remember to choose frames that suit your style and preferences to create a visually engaging and memorable display.

Wedding Photo Framing & Printing Ideas

Framous Picture Framing has brought few of the ideas to make perfect memories of couple. Keep your moments alive with these wedding photo framing ideas:

IdeasDetails
Large Wedding photo FramingWedding photos can be professionally printed and framed, arranged into large canvas prints.
PuzzlesAs custom jigsaw puzzle for a fun and interactive display.
Books and AlbumsCreate wedding photo books or albums to preserve and showcase photos.
CollagesArrange a proper place or wall in home for wedding photos collage or can make a frame of it as well.
CalendarPersonalized calendar can be a fun too.
GalleriesHow about decoration of gallery wall with wedding photos and art?
CardsCustom card is one of the best idea to revive the memory.
Digital DisplaysDigital photo frames can be used to rotate through photos, and slideshows can be created for special occasions.
Shadow BoxMementos from the wedding day can be showcased.
Guest BookFrame a page from the wedding guest book along with a favorite photo from the event.
AcrylicProvide a sleek and modern way on clear acrylic sheets.
JewelryTurn a small wedding photo into a locket.
Canvas Tote BagsPersonalize canvas tote bags can be elegant and memorable.
CoastersUse wedding photos to create custom coasters for home.
MugsHave wedding photos printed on mugs for enjoying coffee or tea.

Displaying wedding photos in these various ways allows couples to cherish and share their special memories in a meaningful and personal manner.

Conclusion

Wedding photo framing is an art that transforms lovely memories into timeless keepsakes. The right frames enhance the aesthetic appeal and protect them for generations and generation as a major part of most loveable and important memory. The arrangement of photos helps relive the story of your special day. Selecting the right frames and creating a meaningful arrangement is crucial to preserve the magic of your wedding day and evoke cherished emotions for years to come.